Google+  with milk and sugar blog: DIY
Showing posts with label DIY. Show all posts

Sunday, October 14, 2012

Twine Wrapped Block Letter {w/ crafts}

well hello there, glad you could join me today.


This past week was almost cool enough to be fall in San Diego, which meant I jumped at the opportunity to craft. The cooler weather brings it out of me. Last year I tackled a dozen projects - leaf stamped gift bags, leaf mod-podged mason jars... see a theme here? It's true, I absolutely love fall. But this craft today is perfect year round.

I found my inspiration here but decided to make it as a monogram that could sit on my bookshelf.

I started out with a spool of hemp twine, a large block letter "A" from Michaels, and my trusty hot glue gun. 


Monday, May 21, 2012

Easy DIY Shelf {w/ style}

hello friends. how are you today? thought I'd share on a recent project from around the house.

***

Have you ever hit a wall when it comes to home decorating?

When we moved into our condo nearly 4 years ago, I wasn't too concerned with decorating. Don't get me wrong, I wanted to be concerned, but there were more pressing matters. Like putting up drywall, or having a kitchen.

Our DIY home renovations quickly snowballed, leaving us with our refrigerator in the living room and the microwave on the fireplace. Needless to say, it took a few months of heavy remodeling before I was ready to hang picture frames.

But once the dust settled (literally) I set about to decorate. I picked frames, hung decorative shelves and sconces, and bought wall art - all on a limited budget. I've been quite happy with our home decor over the years, and perhaps because of that, I stopped decorating. Which, in a sense is a good thing. I didn't want to keep adding more and more stuff and end up on an episode of Hoarders. But I became stagnant. Which is not a good thing. I stopped browsing through stores, flipping through magazines, looking for new decor ideas. Because, in my mind, there was no use for that. It would only make me want something I couldn't have. Oh the lies our mind tells us sometimes.

Enter the world of Pinterest and blogs. So many amazing ideas. I was inspired. Almost immediately I caught the bug. The design, change, renew, reuse, refashion bug. It's been a good thing. It's challenged me to look at things with new eyes. Instead of "this is the way things are", I now think "how could they be?" And, not to get too philosophical on you, but shouldn't we have this outlook on other things in life as well?

So... my dining room wall. It's been seriously lacking in design for the last few years. I hung some cheap wall art, a few sconces. It's been driving me crazy for the last year. But I didn't know what to do.

My overall interior design style is classic with clean lines. But lately I've been loving the juxtaposition of clean lines with a more earthy feel and some rustic pieces, a la Pottery Barn. I decided to build a shelf out of a 2x6 piece of wood, and apply the vinegar stain used in this project to make it look like reclaimed wood.

I picked out a piece of wood from one of the extras in our garage and the hubby cut and sanded it to the right size. I applied the vinegar stain using the same technique as before.

We attached them to simple brass shelf brackets and then attached it the wall. Voila!


An instant new vibe to the same space. I kept the same wall sconces and added some candles, books, and framed these prints from Vintage Printables.


I also added a mini Martinelli's apple juice bottle that I've been using as a vase to hold clippings from my garden.


Tuesday, May 8, 2012

How Does Your Garden Grow?


hello world. How are you on this fine Spring day? I am doing splendid, so happy that I get to share some of the progress on one of my favorite pastimes: gardening.

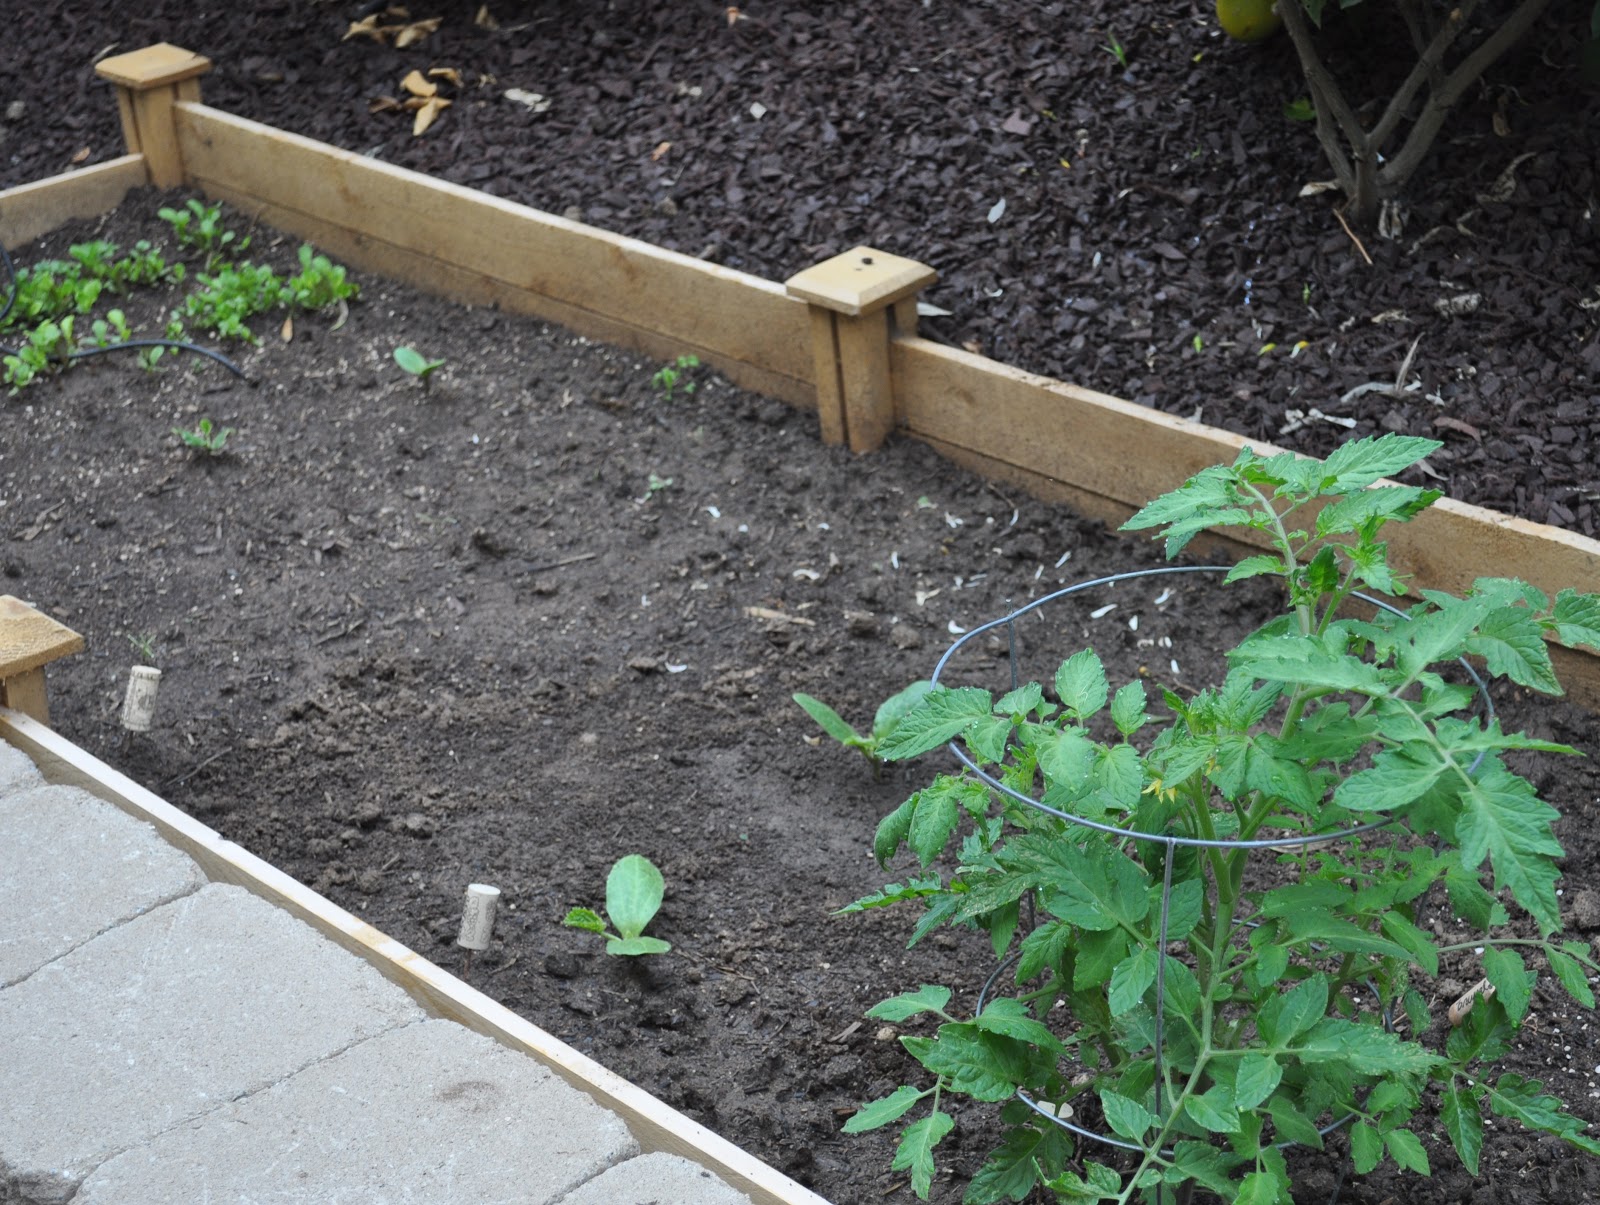
A few weeks ago the hubby built me a raised garden bed in the backyard. It's the perfect size for our little outside space, and large enough to have quite the harvest come summer.


I'm still trying to get the hang of this gardening thing. I've become quite an expert at growing kitchen herbs (basil, rosemary, thyme, etc) and last summer I had some potted tomatoes and jalapenos that did very well. But now I'm transitioning to an actual garden. An in the ground, from seed packets, garden. It's kind of scary.


I sowed the seeds a few weeks ago (zuchinni, mesclun lettuce, and carrots). I was so nervous they wouldn't pop up that I planted more than I should have, with the intention of pinching any extras. I also purchased an heirloom tomato seedling and planted it at one end.

Well, it's only been a few weeks, but so far so good!

The mesclun lettuce popped up right away! Mesclun refers to the spring greens mix that are harvested young (also called baby greens). This type of lettuce is "cut and come again" meaning it will continue growing once you harvest it. I decided on mesclun lettuce after reading a post on it here. I've been told it is easy to grow, and given that I am definitely a beginner, thought it to be better safe than sorry.


The zucchini took a bit longer, but they sprouted soon after. I was so happy! I decided to make my own garden markers with left over wine corks and copper wire from this idea on Pinterest.


They've started to take off. I've heard that zucchini's will get HUGE {several feet wide} so I need to reassess my organization of them, considering that all of my seeds sprouted.


The carrots are taking a bit longer, but I've been told this is to be expected. There are a few green sprouts in the area I planted the seeds, but they rather look like weeds. I'll just have to be patient and wait to see which are carrots and which are not.

Anyone have any experience they'd like to share? I'd love to hear your tips or tricks on how to have a green thumb. Please tell me, how does your garden grow?

Sunday, April 15, 2012

Garden Storage Crates

As we keep getting further and further into April, I have this inescable desire to work in the garden. And although the weather in SoCal has been telling a different story, Spring is here!

I picked up a small coiled hose at the hardware store that is the perfect size to reach my new garden bed and to wash off any messes on the deck. We use a drip system to water most everything, but I'm planning to bring in a few potted plants to add some different color and texture. Plus it's just so handy to have an actual hose, even in a small backyard.

The problem is that the hose just sits on the deck. The water spicket is right next to the table, and while its not too much of an eye sore, it doesn't really visually add anything to the space. I decided I wanted a small  crate to store the hose and a few plastic gardening tools. I started asking around and trying to figure out where I could find one. My husband, being the extreme DIYer that he is, decided to make one for me. We set off to the hardware store and picked up a few poplar boards in the hobby section. I kept trying to talk him out of it, saying I'm sure I could buy one that was cheaper (or free), but Steven was persistent. Truth is, he likes to build things. When we got home he went straight to the garage and his worktable to saw, hammer, and nail for about 30 minutes. The result is my perfectly unperfect crate.


My original plan was to let it sit outside for a few months and I'd eventually get the rustic, reclaimed wood style I was going for. Lucky for me, one of the blogs I follow, Lil Blue Boo, had a tutorial on how to get the rustic look in far less time. I followed the instructions using vinegar, steel wool, and tea and here is the result:


I am so happy with the result that I'm planning to get another larger crate and do the same process. I think I'll turn it upside down and use it as a small table for a potted plant. Mayble I'll stencil some words to make it look like an actual vegetable or flower crate. Who knows, the possibilities are endless.


Tuesday, March 6, 2012

Distressed Terra Cotta w/ Burro's Tail Succulent

Hi there! I thought I would share on a little project I did this weekend.

I found the perfect sized mini succulents at the local farmer's market early in January. I'd been looking to add some life (literally) to the bookcases I'm in the process of restyling {a post on this will come soon}.

The succulents were resigned to live in their 4 inch plastic containers for weeks as I've searched high and low for the right pots. I'm still looking, but in the mean time I decided to create my own. Or rather, put some crafty love on plain terra cotta pots.


This was almost too easy. I used linseed oil paint mixed with turpentine to make a thin coat {you could also use acrylic paint mixed with a little water}. Using a standard flat paintbrush, I brushed on the mixture, making sure to avoid any clearly defined brush strokes.


 Once I made sure every visible inch was covered, I took a paper towel and roughed it up a bit around the edges, the way natural wear and tear would look. The combination of turpentine and extremely porous terra cotta helped the paint dry in no time. I used some river rocks at the bottom (to help with drainage) and repotted.


The result is a rustic, distressed style terra cotta that is a perfect temporary home for the Burro's Tail succulent.


Related Posts Plugin for WordPress, Blogger...